Went on a bit of a boxing day spree at Michaels and decided to push up my plans for my first scratch-built terrain piece: a hostile forest. Hobbyists know that passion and energy drive any project. I've done enough grinds to know that you should never ignore an impulse when it pops up. So taking this advice I embarked on a mysterious journey using a bunch of new materials and improvised techniques.

The project and this tutorial log are now complete! Took a long time since I was not on a schedule, but was really fun overall.
Dangerous forest terrain scaled to Warhammer 40K standards. It is themed to the 6th edition forest rule set with some visual elements from each type of hostile forest. The trees are built separate, but fit onto crater gaps within the flat terrain. I will design the flat parts in three pieces so the entire area terrain can be set up in multiple ways. The tree frequency is optional with the tree craters themed as digestive pools when no tree is place over them.
Overall, it will be a dense mossy jungle with thick roots running like veins underneath the ground vegetation. Meanwhile, the trees will be sharp and menacing with silver accents (ironbark forest). Marine and xenos bits will be incorporated into the tree and ground layers mid-project like flies in a web. In the finished work it will appear as though these unlucky few have been digested by the living forest. An ambitious task to say the least.
Overall, it will be a dense mossy jungle with thick roots running like veins underneath the ground vegetation. Meanwhile, the trees will be sharp and menacing with silver accents (ironbark forest). Marine and xenos bits will be incorporated into the tree and ground layers mid-project like flies in a web. In the finished work it will appear as though these unlucky few have been digested by the living forest. An ambitious task to say the least.
Who makes it?
Custom made from the ground up with arts and craft supplies. The way the Emperor intended.
Custom made from the ground up with arts and craft supplies. The way the Emperor intended.
What's the hobby angle?
Sweet piece of battlefield terrain with many set up options. The custom design allows me to make it as I see fit, while the materials used make it very light for easy storage.
Sweet piece of battlefield terrain with many set up options. The custom design allows me to make it as I see fit, while the materials used make it very light for easy storage.
What materials do I need?
This could be an article all on its own, but instead I'll break it up by project phase. I bought all this stuff at Michaels for about $120, but keep in mind I have tons of leftovers. So actual price is probably closer to $50 in materials used. Most of that is the plaster cloth so if you figure out a cheaper alternative or source go for it. Time was a bigger factor for me than cost as I am on holidays now and have the mental tolerance for this project.
Tools
Phase 1 Materials - Structure and plaster

Phase 2 Materials - Textures and priming
Step 1 - Tree skeletons - 30mThis could be an article all on its own, but instead I'll break it up by project phase. I bought all this stuff at Michaels for about $120, but keep in mind I have tons of leftovers. So actual price is probably closer to $50 in materials used. Most of that is the plaster cloth so if you figure out a cheaper alternative or source go for it. Time was a bigger factor for me than cost as I am on holidays now and have the mental tolerance for this project.
Any key techniques?
So far: Plastering, drilling wood, patience, planning ahead, all basing techniques on a larger scale, liquid green stuff work, drybrushing, priming...alright, you need to apply every single element of the hobby here. I won't lie to you. This is the Captain Planet of hobby projects.
So far: Plastering, drilling wood, patience, planning ahead, all basing techniques on a larger scale, liquid green stuff work, drybrushing, priming...alright, you need to apply every single element of the hobby here. I won't lie to you. This is the Captain Planet of hobby projects.
How long will it take me?
This is a side project and it's experimental so I have been working on it for several months. I'm sure it could be done over a couple of weeks. Maybe even a weekend if there wasn't so much drying time involved.
This is a side project and it's experimental so I have been working on it for several months. I'm sure it could be done over a couple of weeks. Maybe even a weekend if there wasn't so much drying time involved.
Tools
- electric drill with something like a 1/8" drill bit (estimate)
- a crap hobby knife for some dirty work
- hobby clippers
- scissors
- old brushes
Phase 1 Materials - Structure and plaster
- round wooden discs slightly smaller than terminator bases (-50mm)
- light wood rod about the thickness of drill bit (or wooden BBQ skewers)
- 22 gauge florist wire (150 feet of it)
- two 11" x 14" foam pads (estimate)
- a brick of dry foam (green florist foam, not the harder plastic version or the softer spongy ones you water...Goldilocks test it)
- 18 feet of plaster cloth (like medical cast cloth)
- Elmer's clear paper or PVA (white) glue
- superglue (lots of the cheap stuff)
- a couple of large leftover sprue frames
- plastic miniature body bits (optional)
Phase 2 Materials - Textures and priming
- Citadel Technical Liquid Green Stuff (optional)
- green stuff (epoxy putty)
- grass flock
- cork
- coarse sand or hobby gravel
- Liquitex Texture Gel
- aerosol spray primer
Phase 3 Materials - Layers and details
- Layer paints as needed
- Airbrush (optional)
- florist's moss (pick whatever type you like)
- grass flock
- artist's Matte Medium
- coarse sand
- Tamiya Clear Red, Gloss (optional)
- P3 Black Wash (optional)
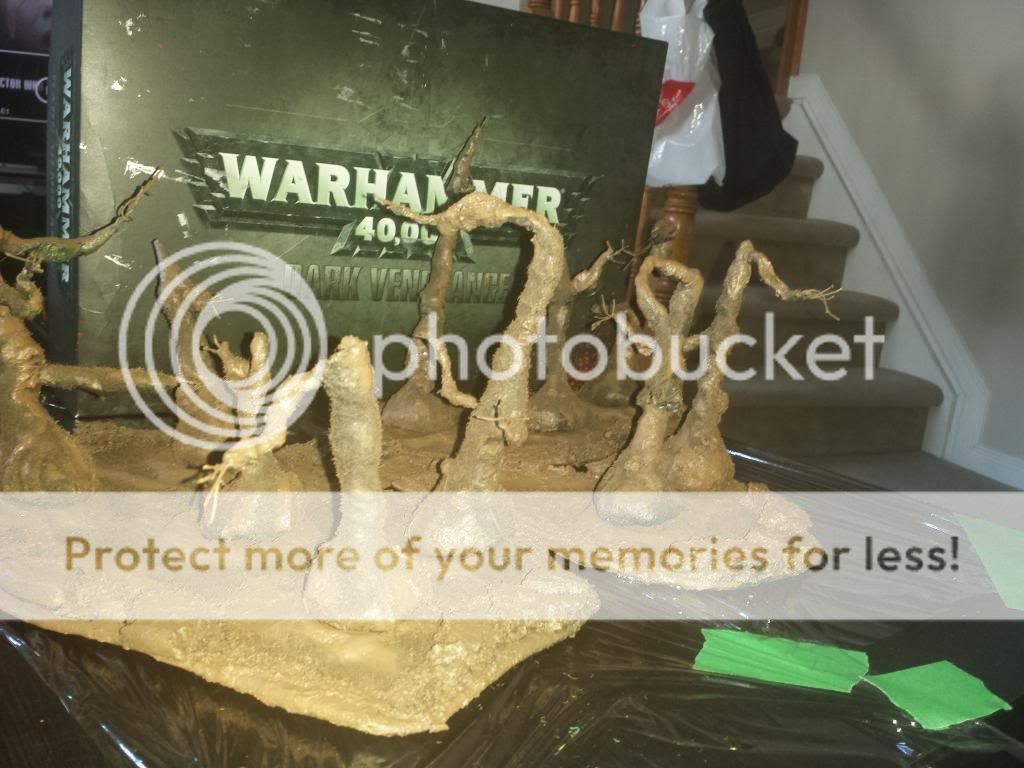
Drill holes into the middle of your discs and superglue (wood glue if you have it) sticks of various heights. Make sure the discs lie flat when dry. Use a marine to judge scale. I'm going for tall creepy trees with sparse foliage to allow me to move the models easily between them.

Step 2 - Fatten up the tree trunks - 1h
Cut chunks out of the dry foam brick so that at least one side is perfectly flat (use the outer sides of the brick). Cut one for each tree and make the pieces tall enough so you can shave them down into a pyramid shape. They will provide a base for the plaster cloth to hug.

Skewer them onto the trees. The foam is soft enough that you can press them flat against the wood disc. Glue them down whole and put a dot of glue where the stick comes out. I used this Elmer's school glue. This was the first unknown move of my project, but I took it since the plaster will dry hard over all this.


Using an old hobby knife, trim down the foam so that it transitions out from the stick and overhangs the base just a little. This part is pretty fun, but messy. Have a vacuum handy and do this over a surface you can crumple up and toss. Foam dust stick to everything.

Wait a while for the glue to set, but it doesn't have to be completely dry. Fingers crossed it dries in the plaster. Be warned that the plaster cloth is powdery as all hell. Put down some newspapers and avoid sneezing at all costs. Cut about 12 three-inch strips of plaster cloth and put them well away from the water dish. That translates to one strip per tree and a few backups. Follow the instructions on the packaging to use. Once the tree is covered remember to rub the plaster around with wet fingers. You want to fill gaps and blend over the cloth net pattern.

Stand them to dry and knock them over after a few hours so the bottoms dry as well. They should stand well even if you designed them a bit crooked. Mine tip easy, but I plan on offsetting the weight with more wire branches on the weak side.

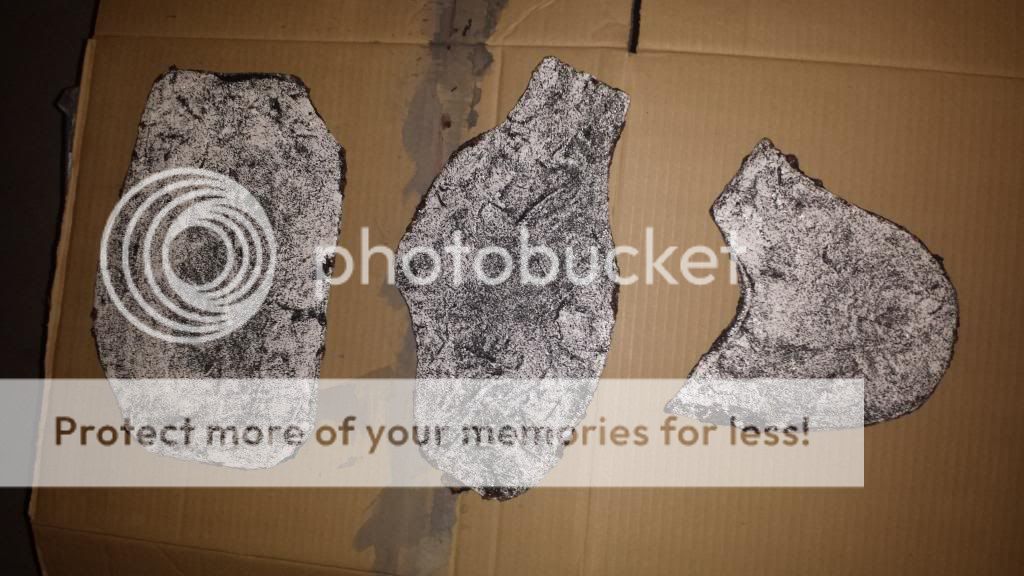
Step 4 - Map the forest on foam pad
I picked the foam pad as a base at a risk of not being familiar with its properties. I don't have access to plasticard and I wanted to avoid paper solutions like cardboard or foam board because the plaster process is very wet. So far, the foam pad has been a success. It is cheap, light, easy to cut and takes well to plaster cloth and superglue. It does not take so well to paper (school) glue, but I've plastered over all the sketchy bits. The plaster dries hard so the floppiness of the pad is not an issue.
Also, I plastered all around the pad to avoid any reactions with the aerosol primer paint. I've heard some stories about the propellant melting foam.
I went off on a tangent there, but back to it! Cut out your forest terrain how you envision it. I left some of the original flat edges on the three pieces so I can line them up in different configurations. Place some leftover discs all around to represent the tree placement and mark the pads. Easy marking is another benefit of this material.


Step 5 - Terrain skeletons - 2.5h
Using the hobby knife and the rest of the dry foam brick, cut out foam rings. Start with a square tile of foam. Use a wood disc to saw out a hole. This is where the tree trunk will rest. Once you have a square tile with a hole in it, chop that square edges into a circle. Then, trim it down so it doesn't rise too far above the foam pad. Glue them down. I used Elmer's and it didn't take too well, but I wanted to avoid some unexpected melty reaction from the superglue. I have since bought foam glue and will report after using it.
This next part is some sweet recycling magic. Clip out strips of leftover sprue frame and superglue them around the craters. They will glue on solid. This step reinforces the integrity of the surface and will create some amazing underground roots once plastered over.


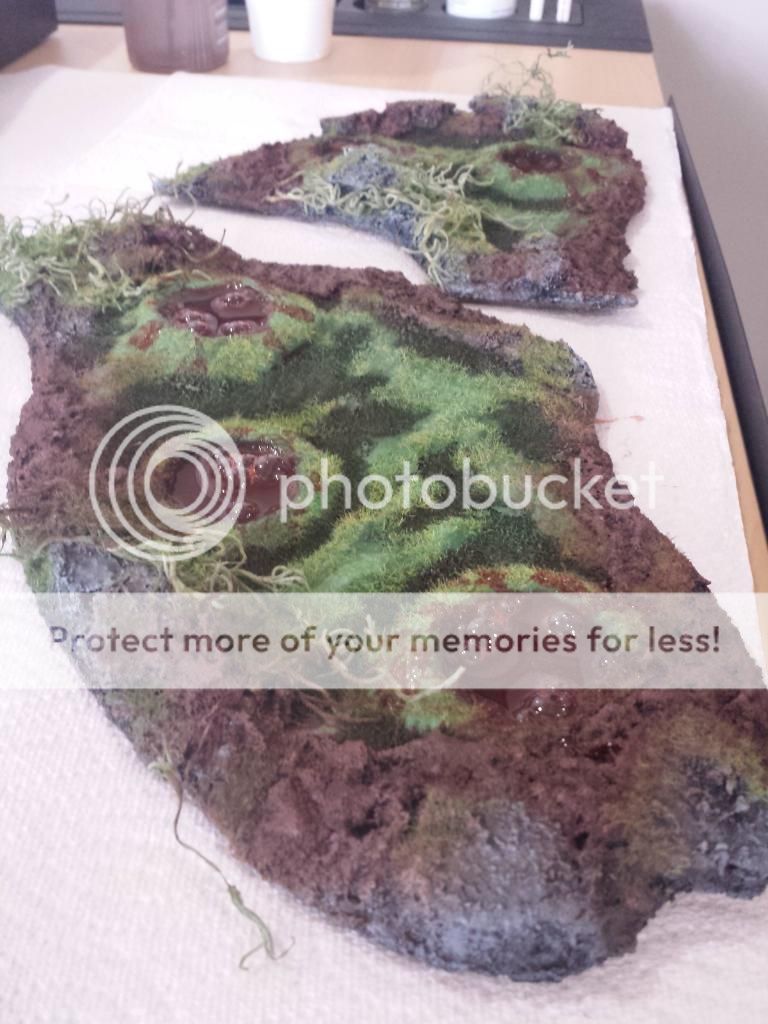
Step 6 - Plaster the forest bases - 1.5h + 48h drying time
This step is much like the tree plastering one. Three-inch strips around the edges and over to the bottom of the foam board. When covering craters make sure to push the wet cloth around the inside lip of the craters so it doesn't dry stretched over the indent. Also, try running top strips across multiple sprue pieces and overall liberally to boost the who thing's integrity.
Don't forget to spread the plaster around with wet fingers. I also used the mounds of plaster dust that fell out of the bag to fill in gaps. Sprinkle over gaps, wet your fingers and work it into a paste.

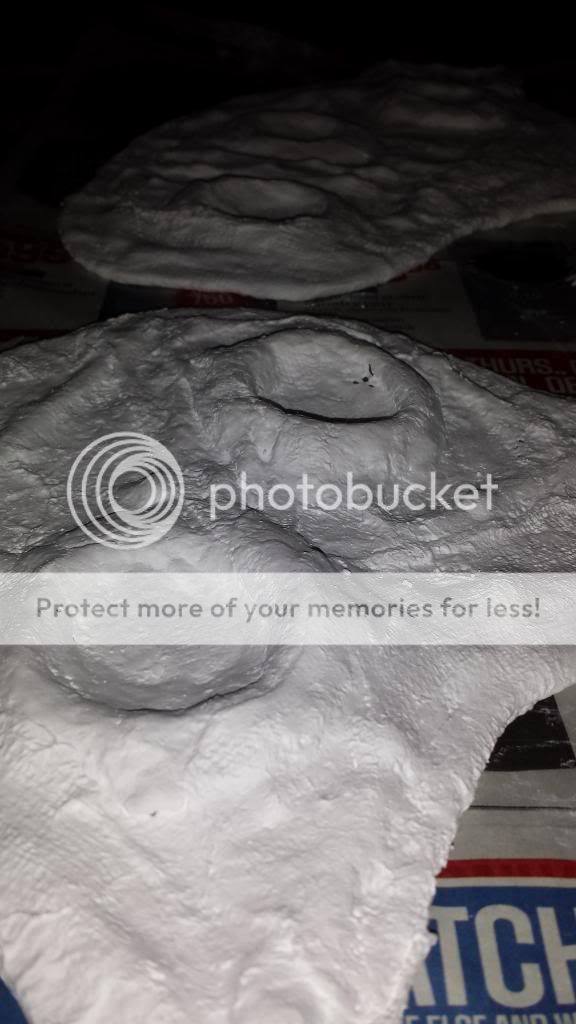 |
| you can see how nicely the "sprue as roots" gambit turned out |
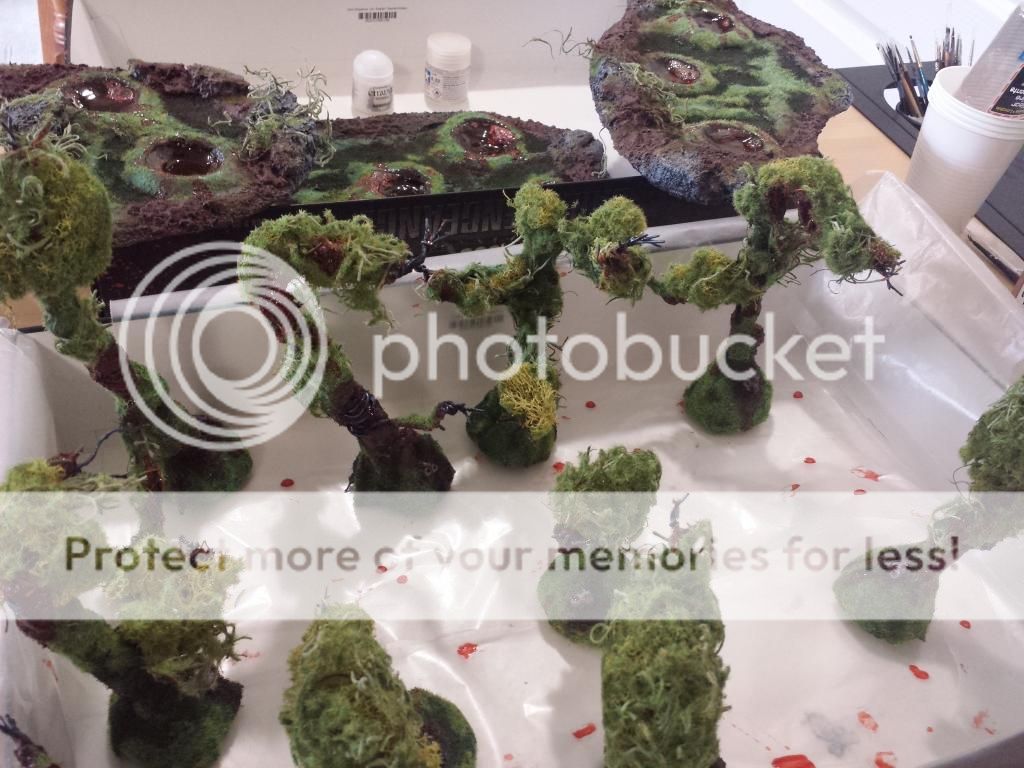
Step 7 - Wrap the trees with wire - 3h
Make sure the plaster is dry before beginning this step. Spool out a healthy length of wire. No need to cut it from the roll for this. Cut only when you finish a strand so you don't waste. Leave about 2-3 inches of wire dangling from the trunk and wrap towards the top of the tree. Leave about 3 inches of wire above the treetop before cutting it. This leftover wire will be twisted together to form your branches. Plan for 5 wires per branch. Repeat this process and stop in the middle of the tree for branches lower down the trunk.

Once all the trees are done twist the loose wires into branches and clip the roots so the wires support the tree. Because the trees were designed with a lean they had problems standing up on flat surfaces. The wire roots and the weight of the branches helps offset this somewhat. However, as I learned after plastering over the wires, the weight of wet plaster cloth negates all balance adjustments. Once it dries it's a bit better. Just keep in mind it isn't an exact science. On the plus side, the craters from the area terrain work well with the spherical bases.

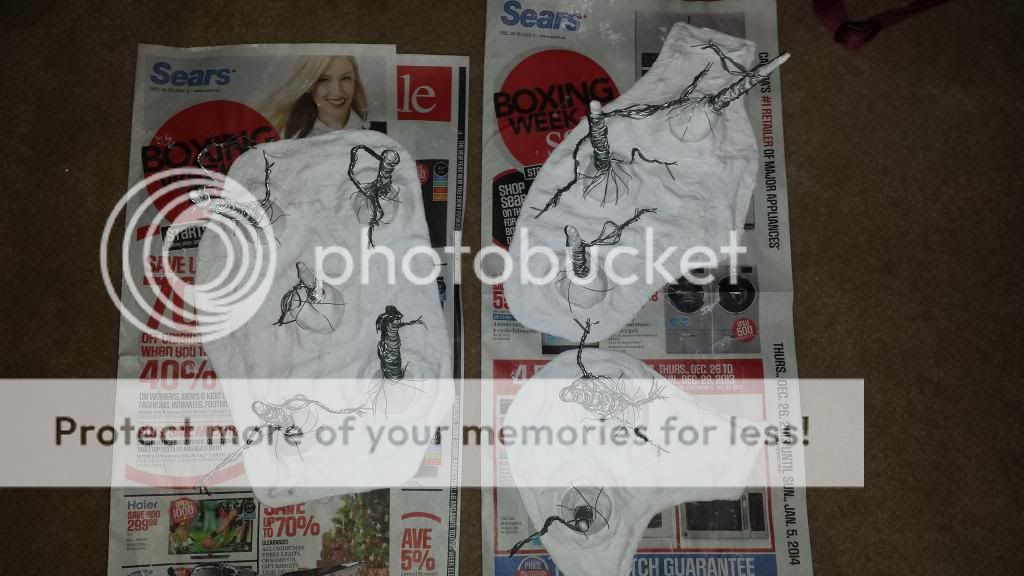
My plan was always to plaster over the wires, but also keep some evil character in the trees. To this end I superglued extra Warhammer 40K bits in the trunks and branches, then I wrapped more wire around the large pieces to secure them. I wanted to make it seem like the trees were digesting some poor victims. Won't really know how effective this is until the painting stage. Still a bit of fun though.


It's been so long since I updated this article that I seem to have misplaced or straight up neglected to take pictures of this step. Not a big deal. You'll see these works on future steps.
I won't spend much time on this description. It's a basic rinse-repeat of the previous plaster steps with bonus lessons learned. Lesson one. This took a hell of a long time. It wasn't a mindless grind repetition that you could offset with a Netflix documentary about Amazon tribes either. It was a long run of sheer worry, frustration and adjustments. Lesson two. Don't wrap the trees and try to cut the plaster cloth with a knife to represent peeling bark. It will not work. It will not work at all. Lesson three. Leave some of the wire ends exposed. This will take a while to dry.
Step 9 - Seal it all in, somehow
This is one of those steps which may have been completely pointless, but you can never really tell. The concern here was the delicate plaster chipping on a dime. I wanted to seal it in (at least a little) so the primer would have more than a porous surface area to cling to.
I first spray varnished everything and let it dry overnight. Then I used an entire pot of very watered down Citadel technical Liquid Green Stuff on everything! It felt like more of a wash during the application. The goal was to smooth out some of the imperfections in the plaster and maybe seal the whole thing. It was successful even though chipping still happens.

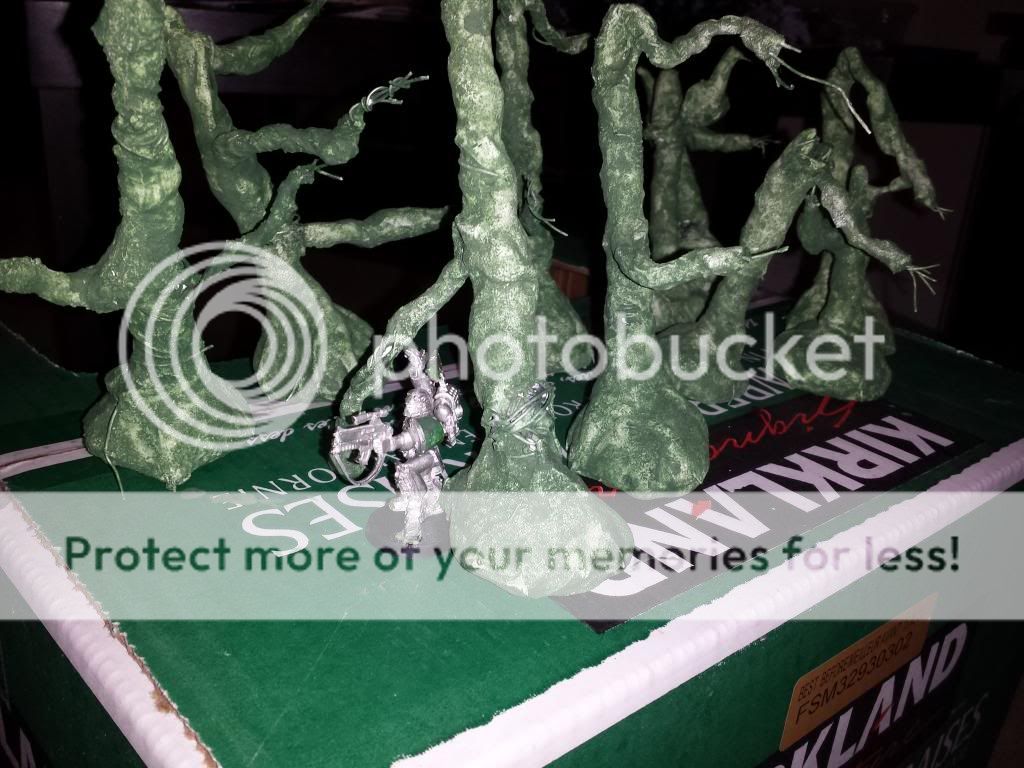 |
| a marine among the trees for scale, good texture on the trunks |
Step 10 - Green stuff spore pouches - 45m
I made these doodads out of green stuff to add some flair to the trees. Three balls superglued into a cluster then poked a bunch with a needle. I plan on painting them red to show their importance to the plant biology, or some junk like that.

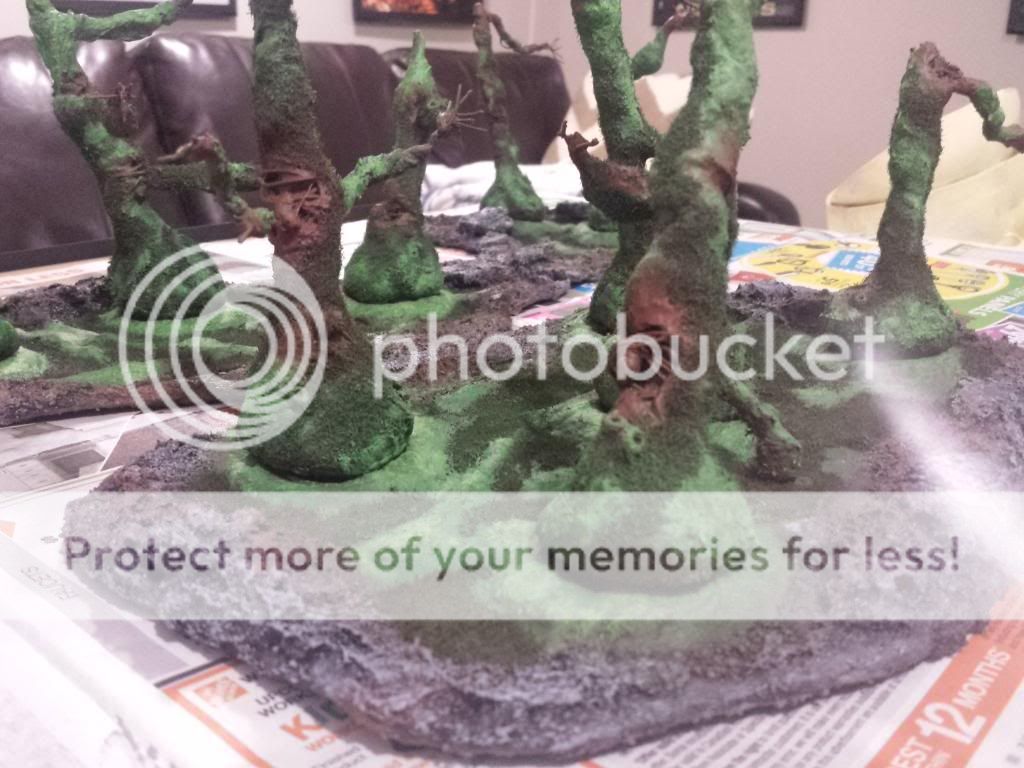
No seriously, flock it. Flock everything you can get your hands on. Wink, wink, nudge, nudge. I used PVA glue and some citadel flock I'd been hoarding for 12 years from a failed start into the hobby in high school. I got as far as buying the flock.
The key here was to use the flock to create texture since I will be priming over it. I've never seen this done, but what could go wrong? It will also help buffer the plaster from chips (hopefully).

Next, I did the same thing on the forest bases being careful not to cover the major root system. Get rid of the loose flock once everything dries. I smacked and vacuumed the hell out of the pieces.

Break off a bunch of cork and PVA glue it at various points on the edges of the terrain. This is when the piece starts to take on a life of its own. The rationalization for this is that my hostile forest has broken through my concrete city-themed table. The cork also adds vertical volume to the piece and some interesting steps. This will be painted in graphite grey and will have vines (florist's moss) flowing over them. I am expecting nothing short of epic for the final product.

I had some pretty useless craft quartz rock laying around so I used it here to transition the big cork rocks and the flat soil. Pretty standard heavy PVA (white) glue application. Then pour the gravelly stuff and let dry. Make sure to give it a strong brushing with a clean brush after it dries. You want all the loose bits to fall off.


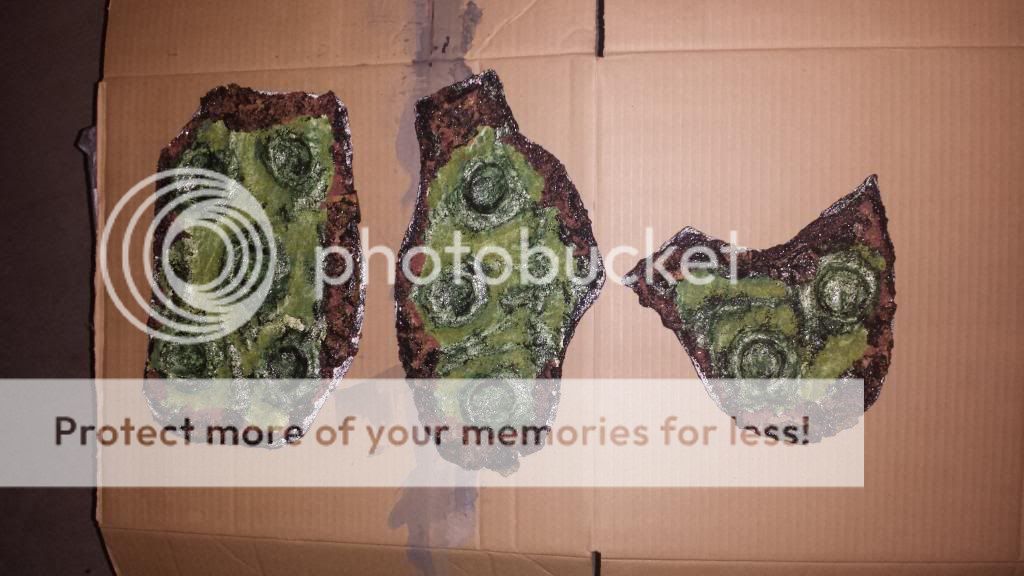
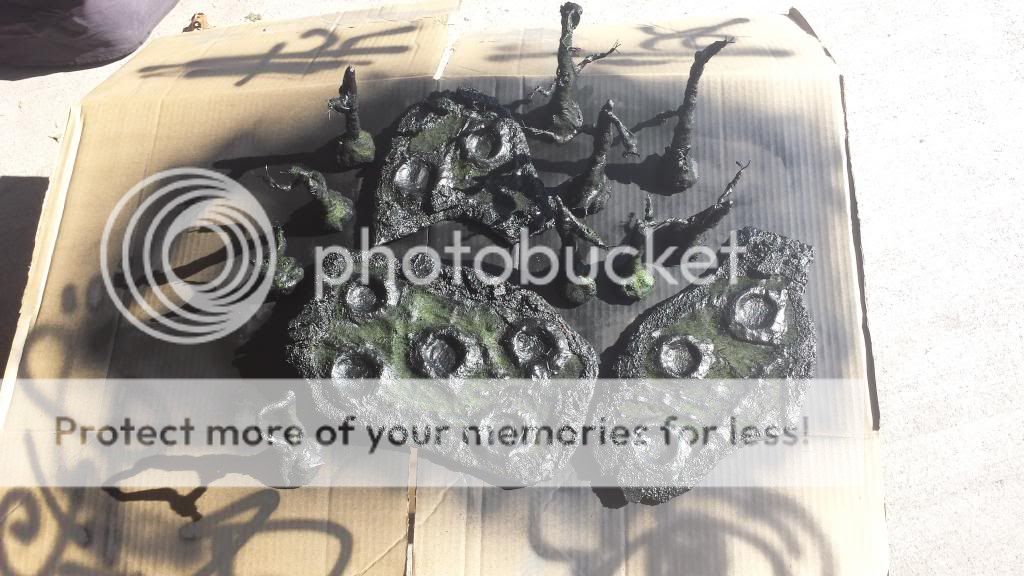
I wanted to give the whole thing a texture and I happened to discover Liquitex Texture Gels around the same time. So I went crazy. Hoped to get some protection for the plaster and a bit of a rough base at the same time. This particular texture gel is Black Lava. It's very fine and doesn't exactly come of as a sandy layer. I recommend trying the sand gels.


Nothing special here. I used some left over The Army Painter sprays to finish the cans off. If you're buying fresh cans I recommend the cheap stuff like Krylon Indoor/Outdoor. Any hardware store will carry these at around $5 per can. I chose to go black first to cover the colour hodgepodge you see above. The brown was chosen as a good base to build the green paint and flock upon. It's really coming together.


By pure coincidence I happened to pick up a brand new (older model) airbrush at a garage sale for cheap. I read up on the mixing process to make airbrush ready paint and I went to town on this terrain. Having it primed gave me the piece of mind to be able to put down paints and know they would stay. It also allowed me to test the limits of the airbrush without worrying about destroying the project.
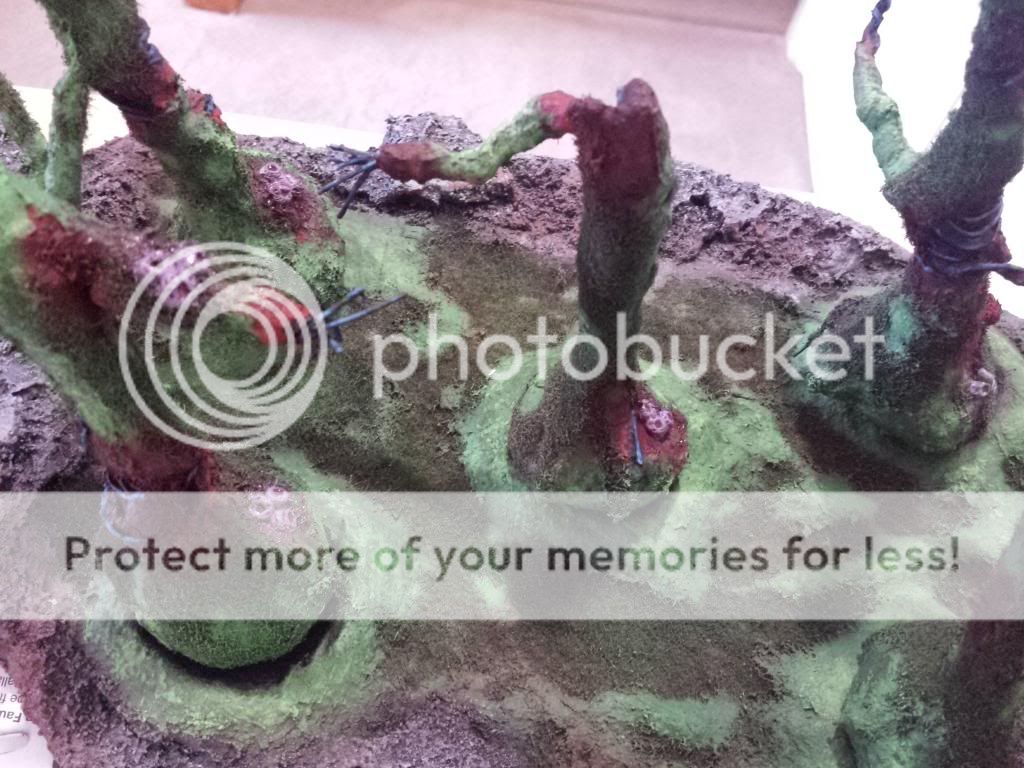
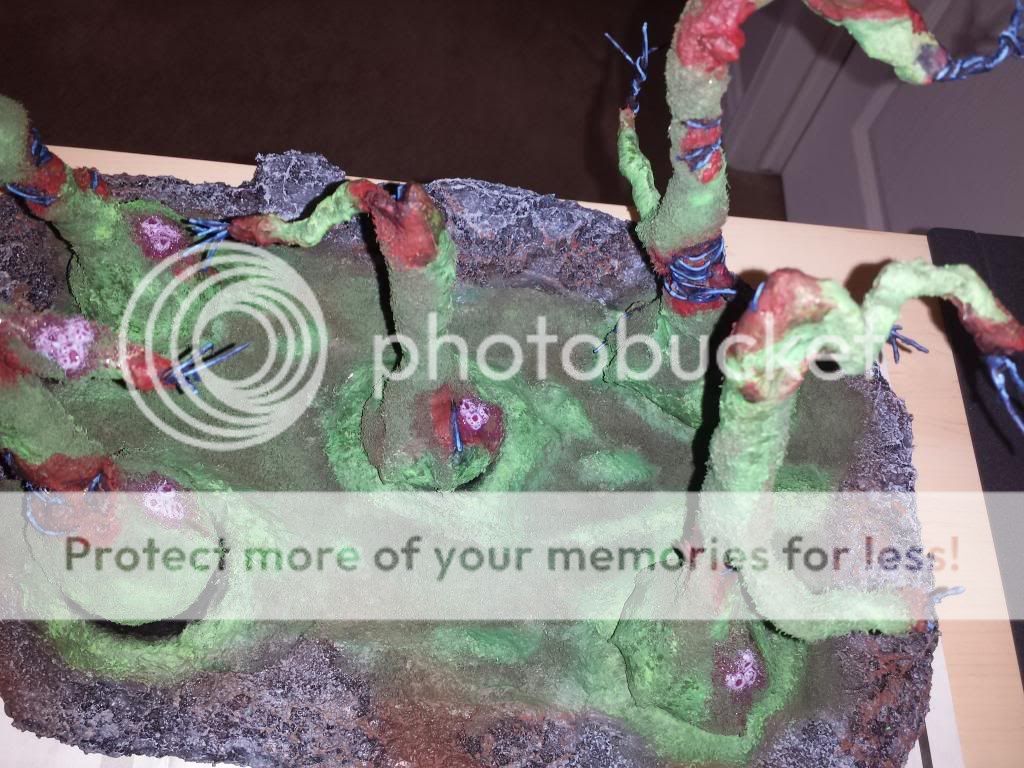
My aim here was to spray green with a base, shadows and highlights. The next step was to isolate some parts of the trees in browns and reds to make it appears as though (battle) damage split the bark and the bloody sap inside made the damage look like an organic wound.


I ran a standard detail process on the concrete parts of the bases with its base layer in grey, a black wash and a light grey drybrush. I also picked out the death berries I made out of green stuff. I just made them stand out from the tree by using a violet mix. The roots and tendrils that stick out of the trees were picked out in blue to look like veins. Even though I did all these details quickly and crudely it really adds depth to the entire piece.


 |
| Natural light |
 |
| With flash |
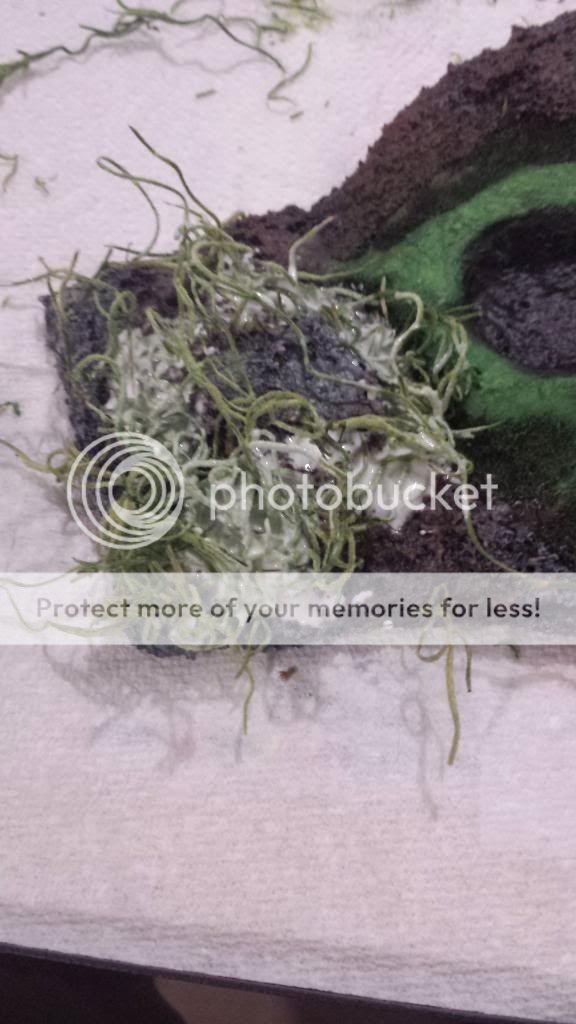
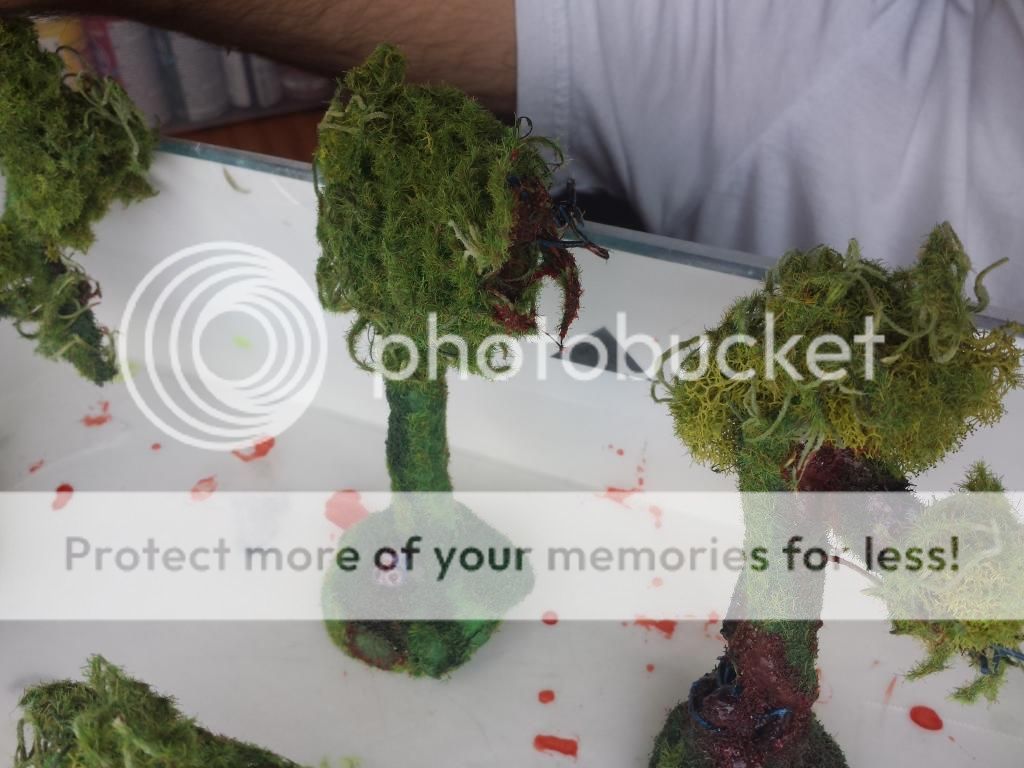
The first type of florist's moss I used had a strong bounce to it and was extremely difficult to keep on the trees' smooth skin. My process was a battle of attrition.
- I used clear school glue in heavy doses
- Put down small chunks of moss in places it could balance against while it dried
- I then made a very watery mixture of the same glue and drizzled it over the bushes
- I let it sit for an hour before the next step
- Out of impatience I decided to weave a wiry moss around the yellow tufts
- This looses a bunch of them so it was careful work
- More watery and pure glue over it all as needed
- Pray it sets...and it did! (eventually)


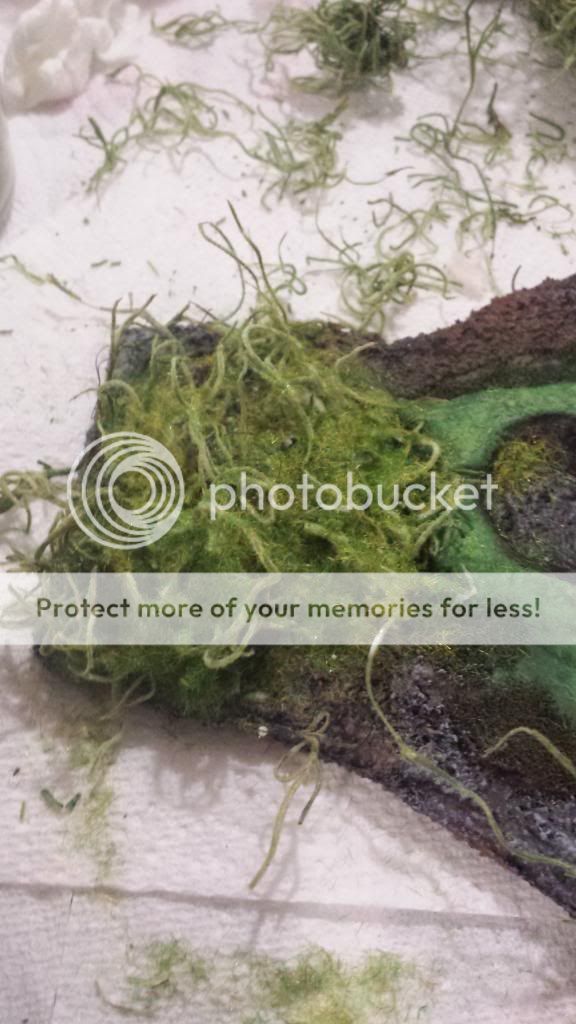
After this step was complete, I planned to use the wiry nature of the second moss to pepper on lots of standard flock. This worked much closer to my expectations. I also went ahead and added clumps of the wiry moss to the bases with PVA glue. This was also followed up by sprinkling flock before the PVA dried. Despite some frustrating moments the end result was a success. The moss structure combined with the flock afro gives the tree foliage a very thick organic quality, which still plays well with light.

 |
| That flocking workstation |
Step 18 - Stony mud texture paint - 2h + 24h drying time
Citadel texture paint is expensive especially for a project this scale. Feel free to borrow my recipe or to experiment with your own blend. A few months after putting it down this mix is holding strong. I wanted to offset the concrete rubble base edges with some dirt to make it appear like the forest had broken through the city streets (my home table is a city theme). I waited to put the dirt down after my moss and flock because I wanted the roots to come out of the dirt instead of just sit on it. After the mix dries you'll want to do a standard wash/drybursh process to give it depth.
Studio Hobby Thumbs' Double Fried Down South Texture Paint:
- 4 parts cheap craft store paint
- 1 part basic artists Matte Medium
- 1 part water
- Blend all three together with a brush
- Add you choice of sand (I used a Citadel kind pictured below to avoid impurities)
- Blend thoroughly
- Apply heavy as needed
- Let dry for a full day


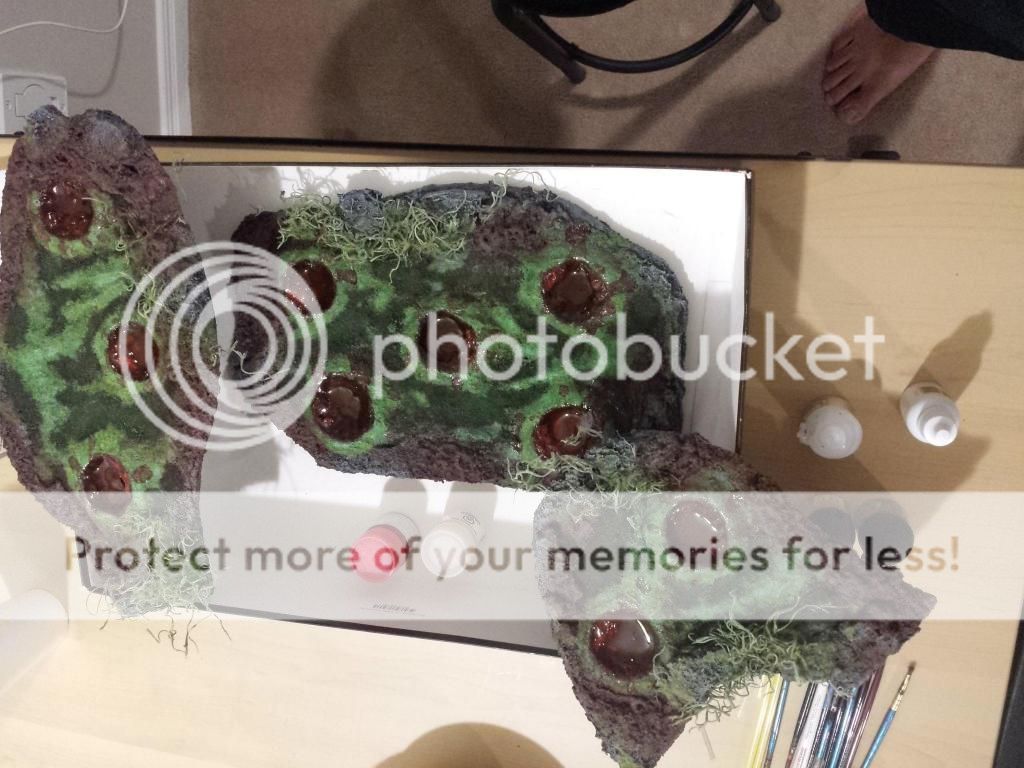
The blood sap was a hair-brained idea that kind of paid off. The goal here was to make the wounds in the tree bark bleed red sap to add a creepy living forest vibe to the whole thing. The second plan was to play on the modular nature of this terrain piece and fill the trunk craters with blood. This allows me to play the terrain without trees sometimes while adding a different angle to the narrative. Two terrain types for the price of one! There's not much technique here apart from the blood sap recipe. I even used materials on hand for this one so feel free to go your own way here. Just promise me you'll go nuts and enjoy yourself on the application.
Studio Hobby Thumbs' Big Mama Soul Food Blood Sap:
- 4 parts Elmer's clear (paper) glue
- 1 part water
- 1 part Tamiya Clear Gloss
- 2 parts Tamiya Clear Red (drip add as needed)
- 1 part P3 Black Wash (drip add as needed)
- Using an old brush, mix slowly to keep streaks in and apply quickly
- Let dry for 2 days at least


And there you have it. Over ten months and a whole bunch of hobby hours later. I know what you're thinking. Was it all worth it? Would you do it again?
In all honesty I probably wouldn't do this again, It was a lot of work for the end product. Am I handier and better versed in the use of 20+ first time materials? Abso-flocking-lutely! So the short answer is yes! it was worth it...as a one time experiment. Any future projects tilted on these kind of materials will be executed with a much tighter workflow, but this project was definitely my hobby version of the Sex Pistols gig at Manchester's Lesser Free Trade Hall in '76. Well maybe not, but it has inspired me to keep scratch building terrain!
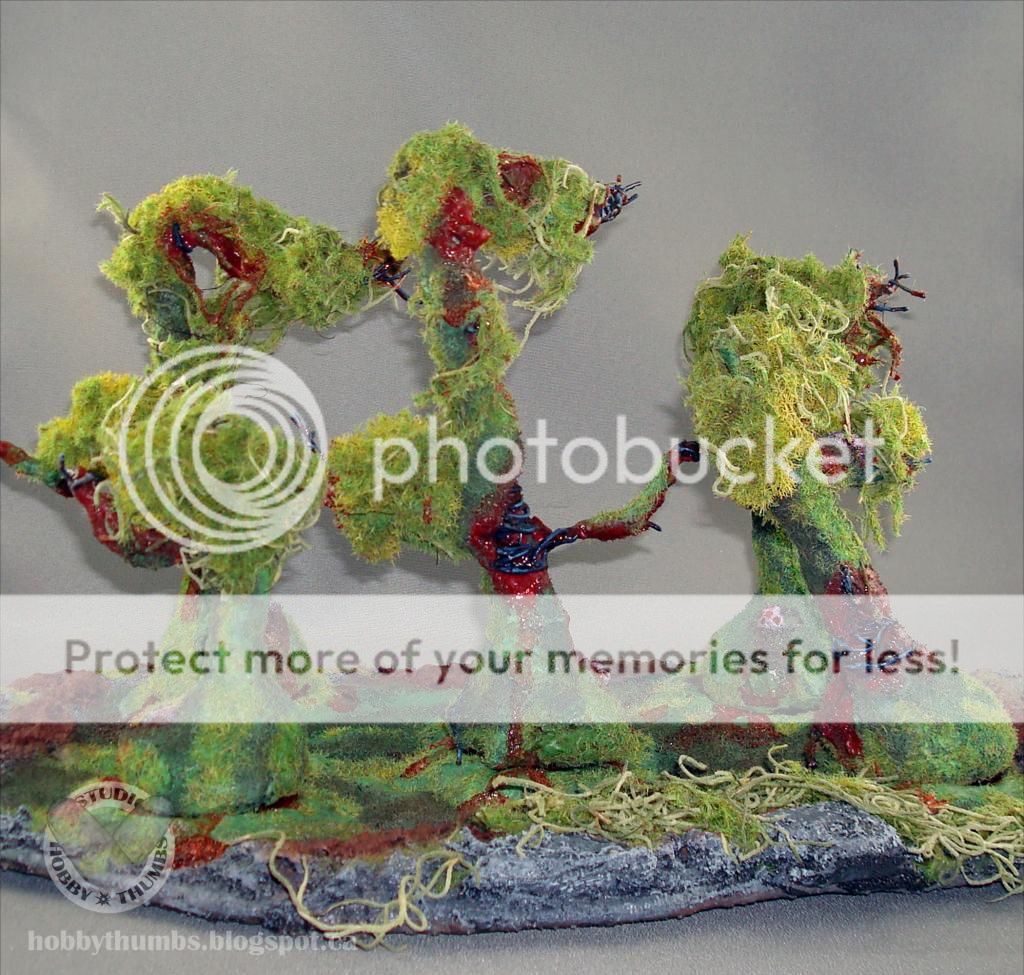
Here are some lightbox photos of my bloody babies. I encourage you to get out there and experiment. All you need is vision and the drive to keep hobbying when all you want to do is trash your frustrations. Hit me up in the comments or on my (very active) Instagram account @studiohobbythumbs if you have any questions. Keep your thumbs clean.


No comments:
Post a Comment